
流程圖:
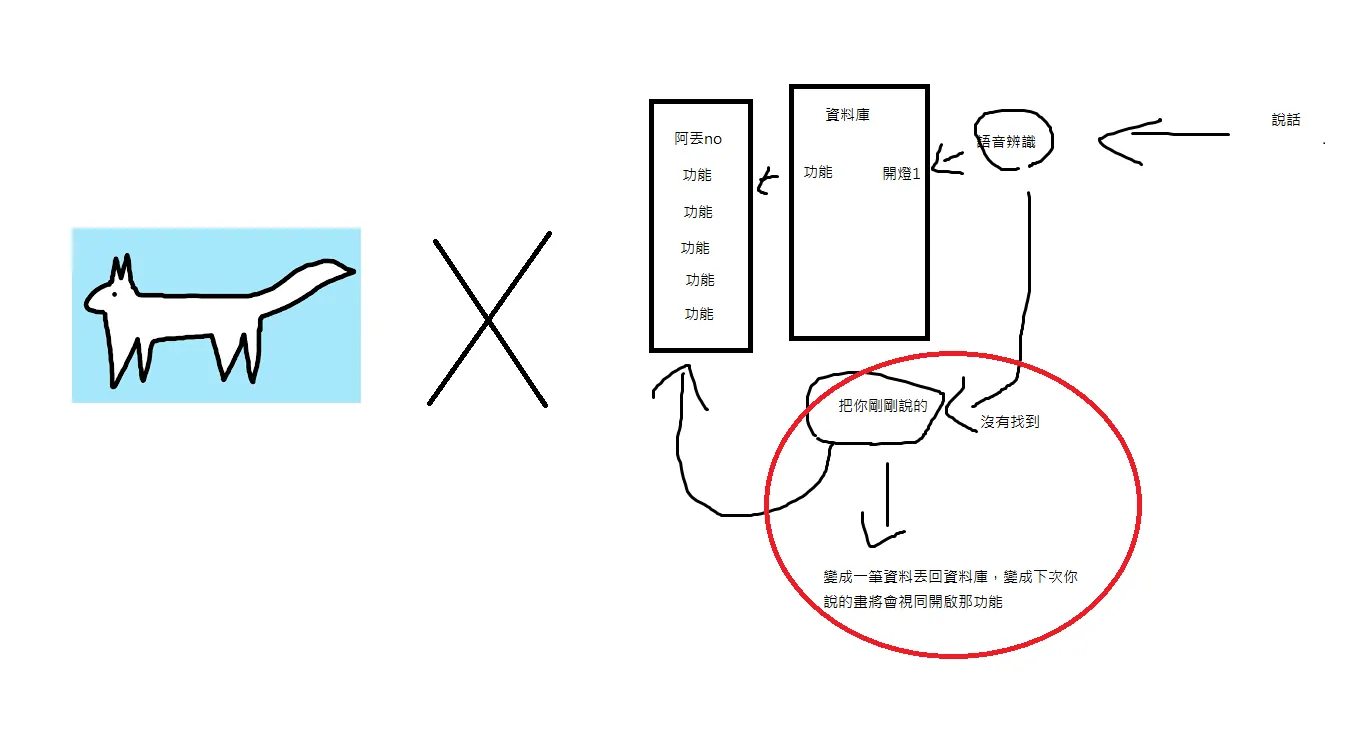
伺服器方面
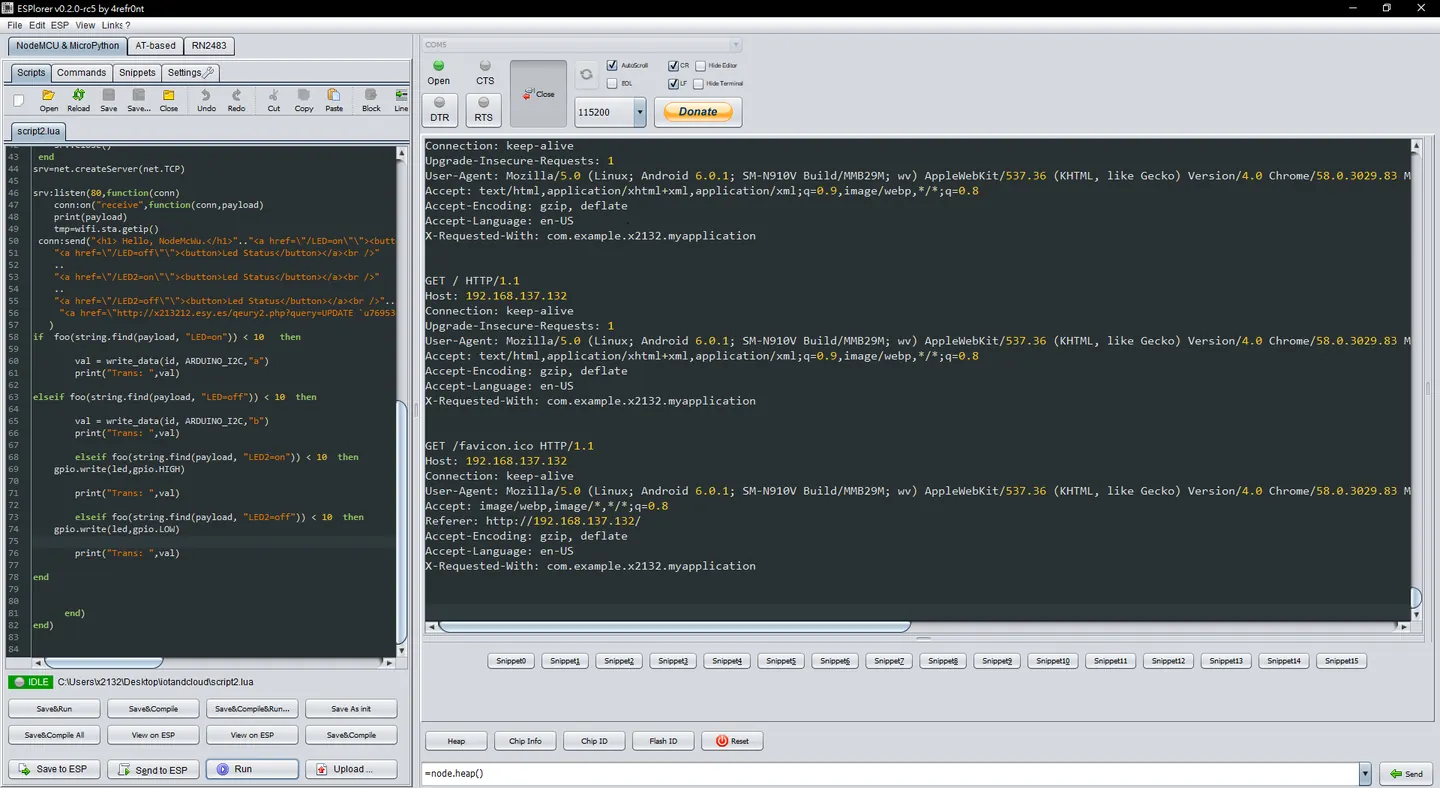
Nodemcu 當作負責產生一個網頁頁面可以透過按鈕去控制或連結去做過濾字串的篩檢已檢測目前動作是什麼
 接腳圖:
接腳圖:
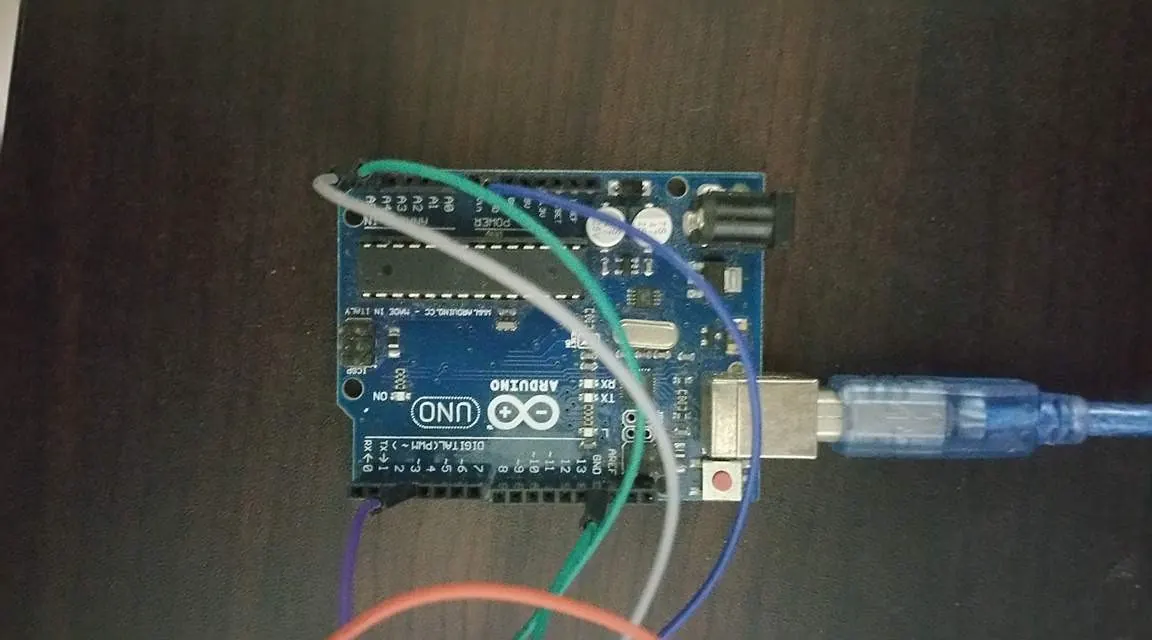
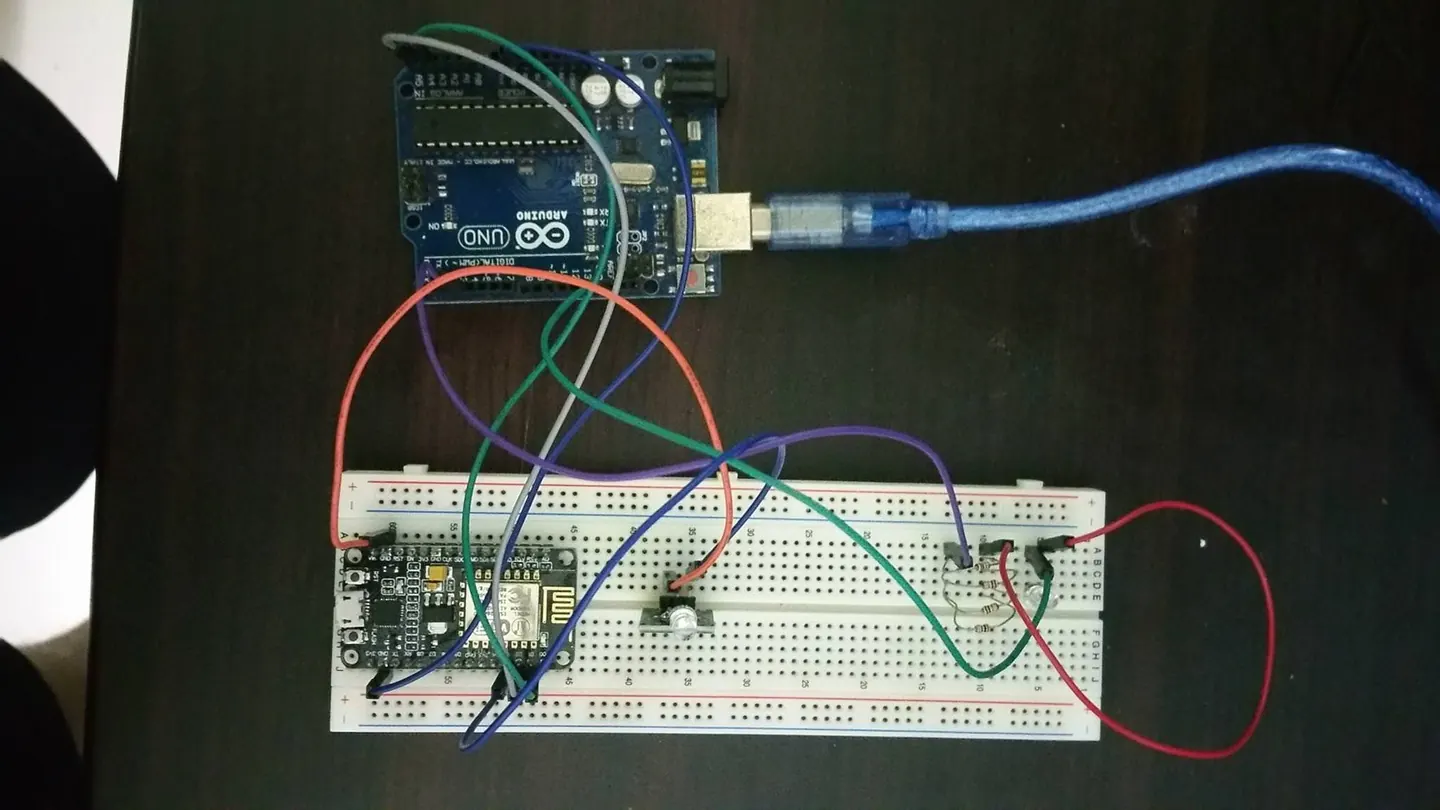
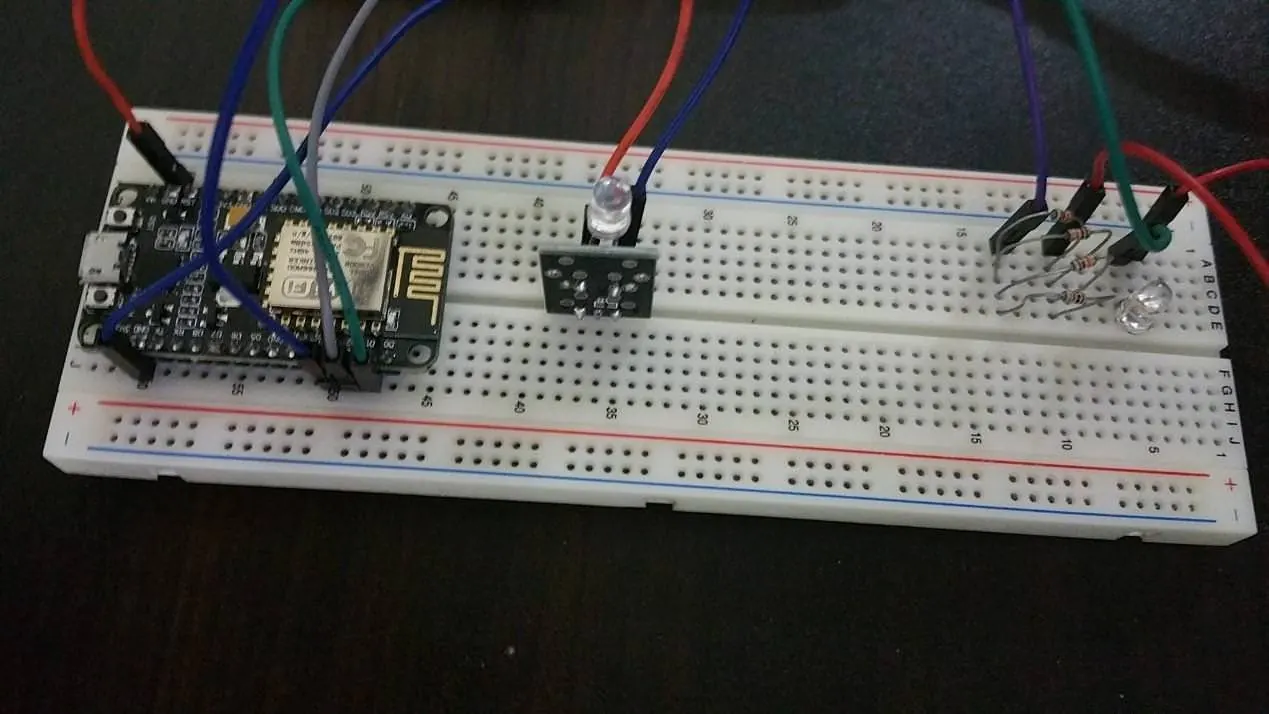
硬體方面:因為在紅外線那邊我們在nodemcu 找不到紅外線的函式庫,最後沒辦法找到,所以使用arduino 內建的函式庫進行紅外線的發送,所以硬體方面是透過i2c進行nodemcu 對arduino進行發送紅外線的指令,然後在nodemcu的畫則是進行伺服器的搭建,負責回應各個指令應對。
軟體方面:app負責處理語音和資料庫的讀取和判斷然後再去發送url瀏覽已進行對nodemcu的操控
Nodemcu:
led = 3
ip = wifi.sta.getip()
gpio.mode(led,gpio.OUTPUT)
wifi.setmode(wifi.STATION)
id=0
sda=1
scl=2
ARDUINO_I2C = 0x15
data=0
i2c.setup(id,sda,scl,i2c.SLOW)
wifi.sta.config("AP","123456789")
       gpio.write(led,gpio.LOW)
function foo(num1)
tmp =num1
if tmp==nil then
    return 255
    else
    return tmp
    end
end

function write_data(id,dev_addr,tmp)
       i2c.start(id)
       i2c.address(id, dev_addr,i2c.TRANSMITTER)
       i2c.write(id,tmp)
       i2c.stop(id)

       return tmp
end
tmr.alarm(0, 1000, 1, function()
   if wifi.sta.getip() == nil then
      print("Connecting to AP...\n")
   else
      ip, nm, gw=wifi.sta.getip()
      print("IP Info: \nIP Address: ",ip)
      print("Netmask: ",nm)
      print("Gateway Addr: ",gw,'\n')
      tmr.stop(0)
      end
   end)
if srv~=nil then
    srv:close()
 end
srv=net.createServer(net.TCP)

srv:listen(80,function(conn)
    conn:on("receive",function(conn,payload)
    print(payload)
    tmp=wifi.sta.getip()
 conn:send("<h1> Hello, NodeMcWu.</h1>".."<a href=\"/LED=on\"\"><button>Led Status</button></a><br />"..
    "<a href=\"/LED=off\"\"><button>Led Status</button></a><br />"
    ..
    "<a href=\"/LED2=on\"\"><button>Led Status</button></a><br />"
    ..
    "<a href=\"/LED2=off\"\"><button>Led Status</button></a><br />"..
//mysql 插入等等
     "<a href=\"http://x213212.esy.es/qeury2.php?query=UPDATE `u769530028_map`.`test2` SET `function` = '"..tmp.."' WHERE `test2`.`name` = 'nodemcu_ip' ;\"\"><button>Led Status</button></a><br />"
   )
if  foo(string.find(payload, "LED=on")) < 10   then
//負責進行指令判斷
        val = write_data(id, ARDUINO_I2C,"a")
        print("Trans: ",val)

elseif foo(string.find(payload, "LED=off")) < 10  then

        val = write_data(id, ARDUINO_I2C,"b")
        print("Trans: ",val)

        elseif foo(string.find(payload, "LED2=on")) < 10  then
    gpio.write(led,gpio.HIGH)

        print("Trans: ",val)

        elseif foo(string.find(payload, "LED2=off")) < 10  then
    gpio.write(led,gpio.LOW)

        print("Trans: ",val)

end


      end)
end)
arduino:
#include <IRremote.h>
#include <IRremoteInt.h>
#include <IRremote.h>
#include <Wire.h>
const byte SLAVE_ADDRESS = 0x15;
int led = 13;
byte x;
int tmp;
IRsend irsend;
void setup()
{
  Serial.begin(115200);

         Wire.begin(SLAVE_ADDRESS);
         TWBR = 12; // 50 kHz speed
         Wire.onReceive(receiveData);
         pinMode(2, OUTPUT);
}
void receiveData(int n){
  while(Wire.available()){
   int c;
   c= Wire.read();          // receive byte as a character
   Serial.print(c);         // print the character
   tmp=c;
}
 }
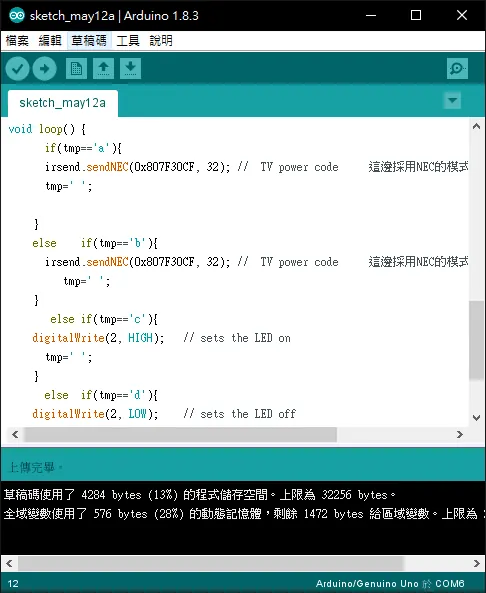
void loop() {
      if(tmp=='a'){
      irsend.sendNEC(0x807F30CF, 32); //  TV power code   這邊採用NEC的模式 ,807F30CF 是我的電視訊號
      tmp=' ';
    }
    else    if(tmp=='b'){
      irsend.sendNEC(0x807F30CF, 32); //  TV power code   這邊採用NEC的模式 ,807F30CF 是我的電視訊號
         tmp=' ';
    }
       else if(tmp=='c'){
    digitalWrite(2, HIGH);   // sets the LED on
      tmp=' ';
    }
      else  if(tmp=='d'){
    digitalWrite(2, LOW);    // sets the LED off
      tmp=' ';
    }
   delay(500);
}
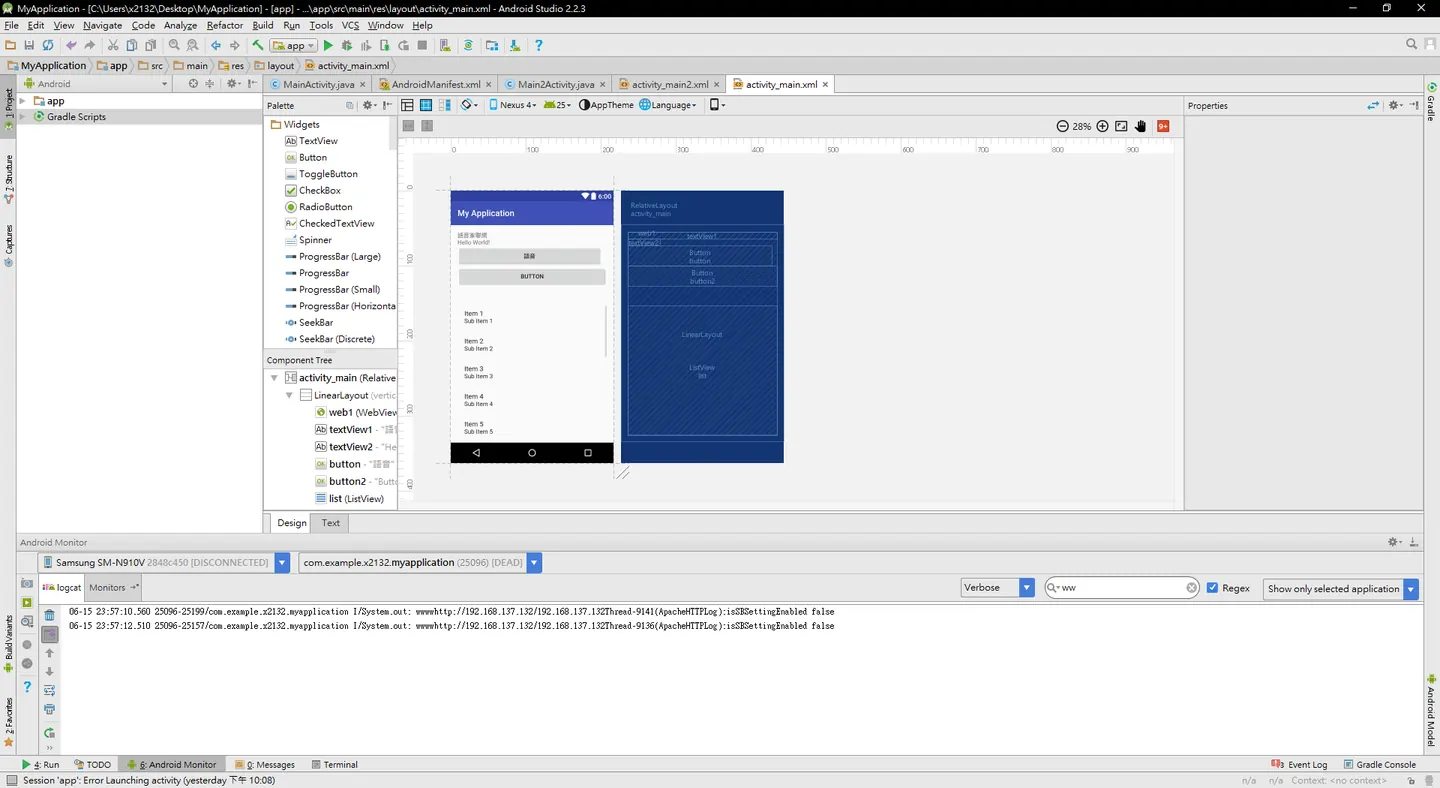
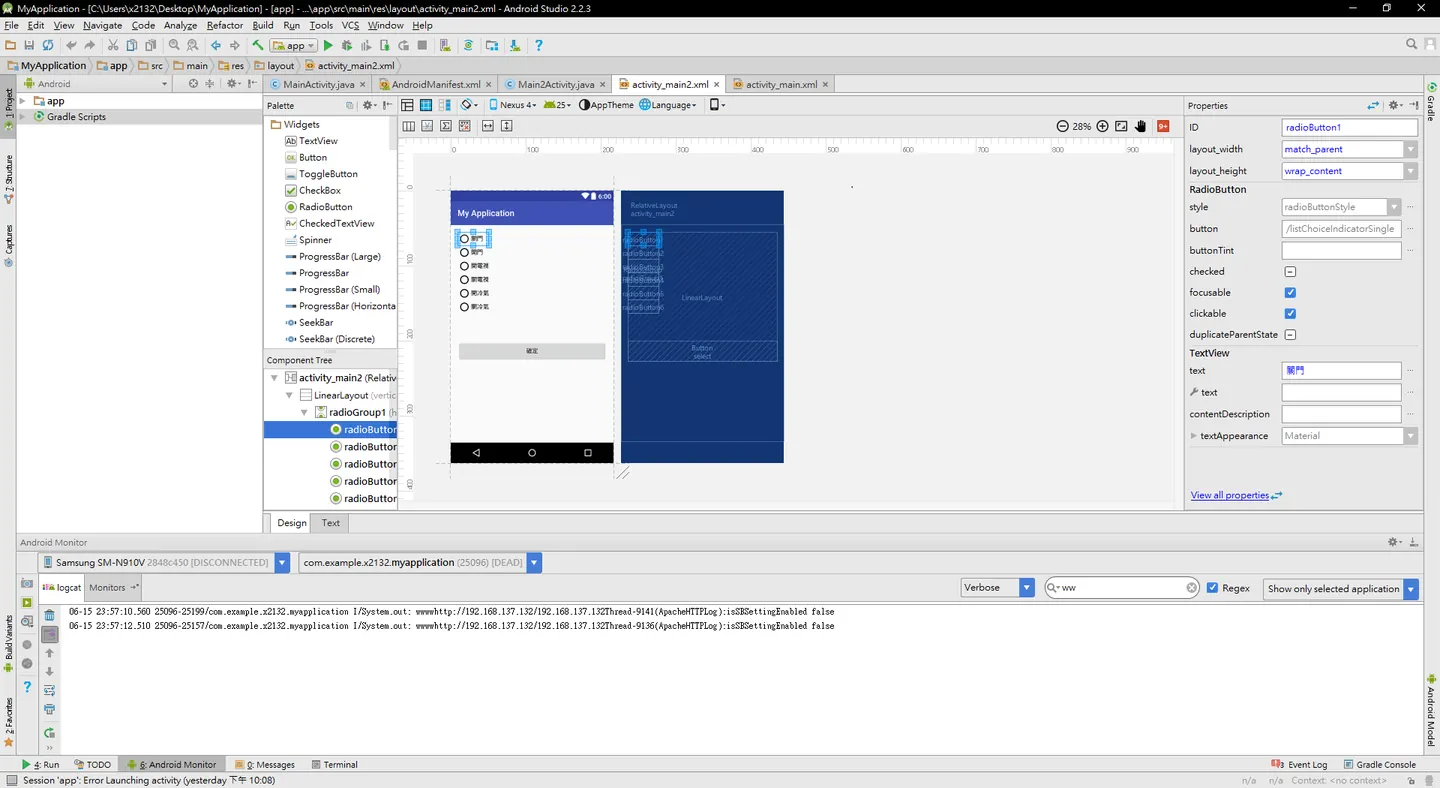
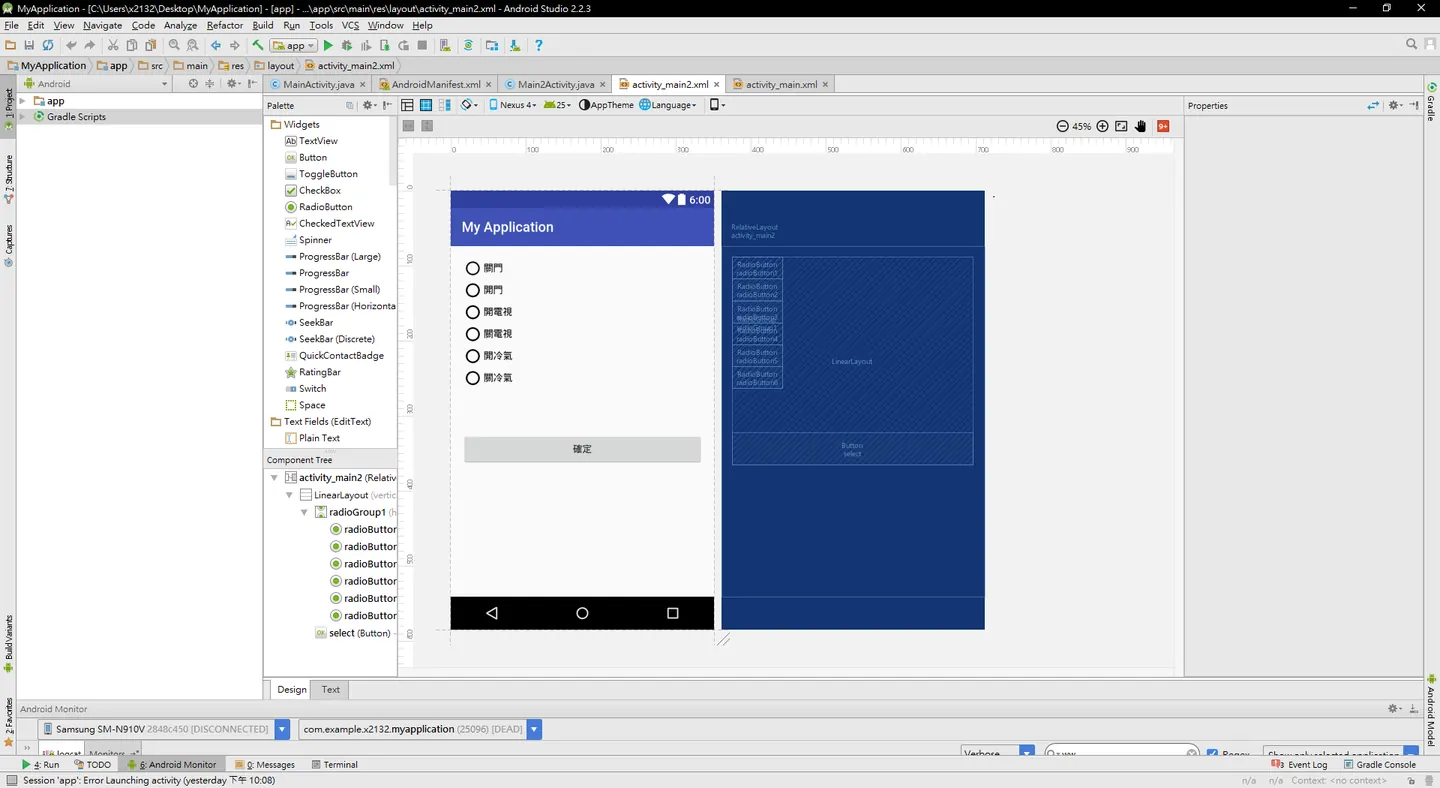
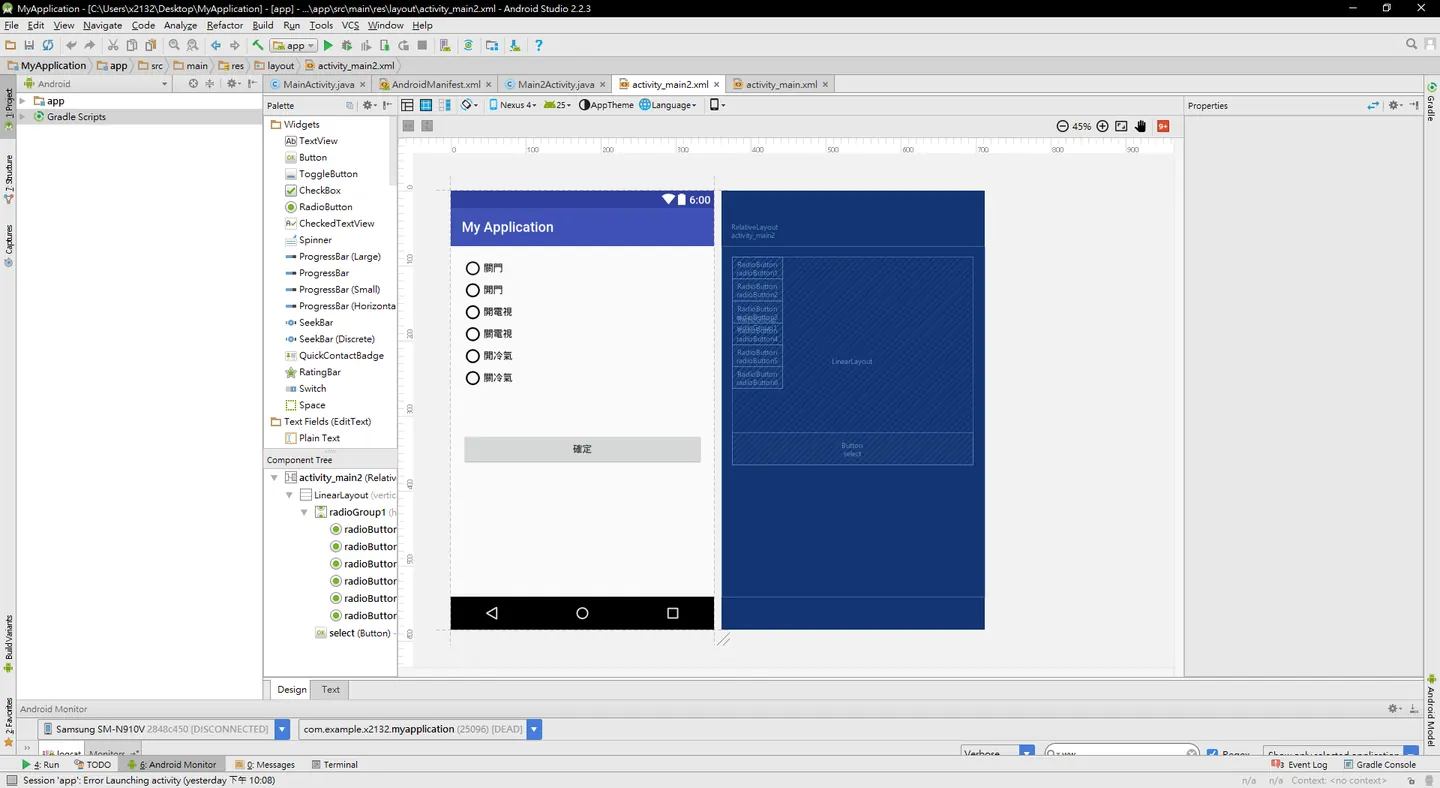
App方面則畫面如下
(1)
 (2)
(2)
圖一可以進行語音的發送與控制
圖二就是按下第一個畫面的新增按鈕則會跳到圖二的畫面選擇完功能回去第一頁面會跳出語音新增的視窗再依序把指令存入資料庫
資料庫方面採用mongodb做資料庫
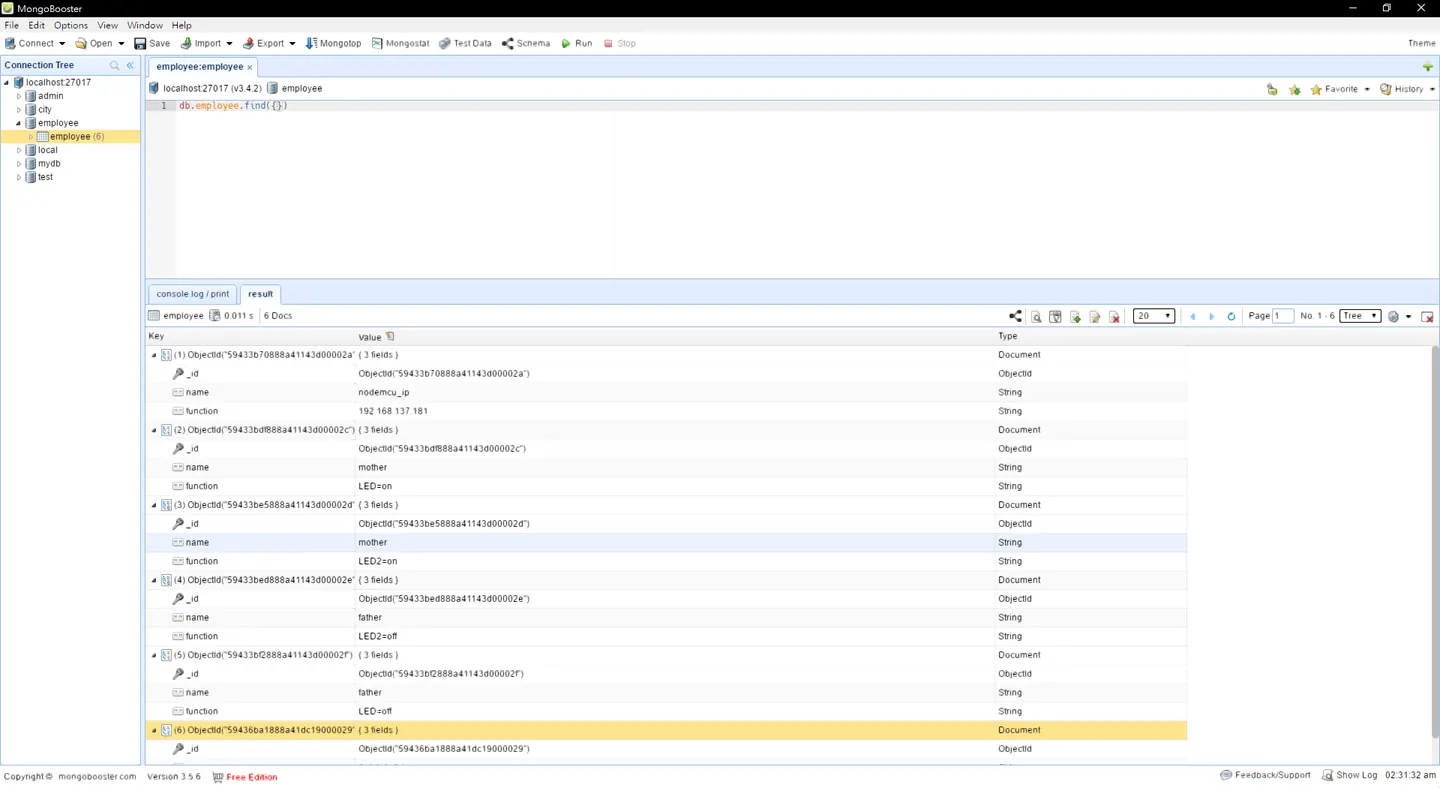
對指令的存取則透過xampp架設apache伺服器 透過
qeury3.php和qeury4.php 去對mongodb做存取或搜尋動作
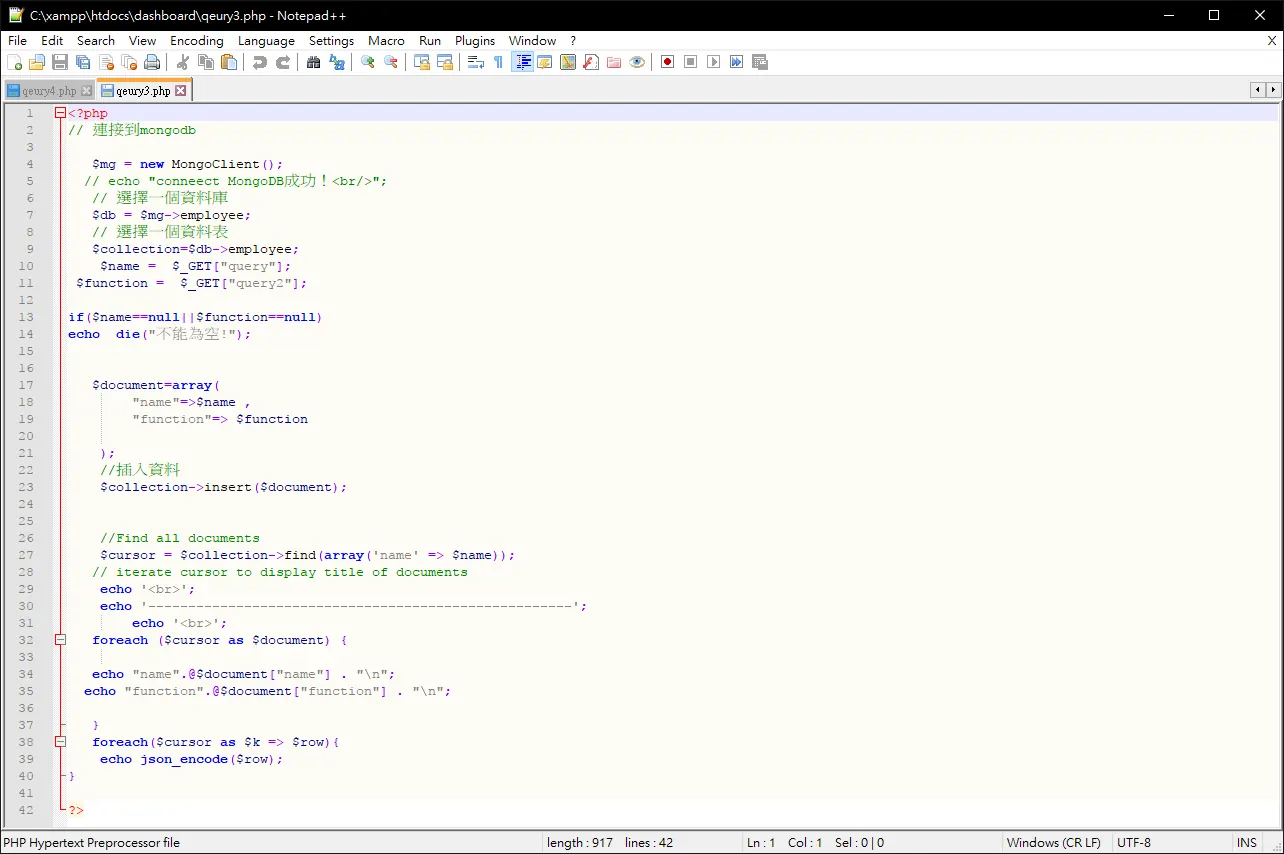
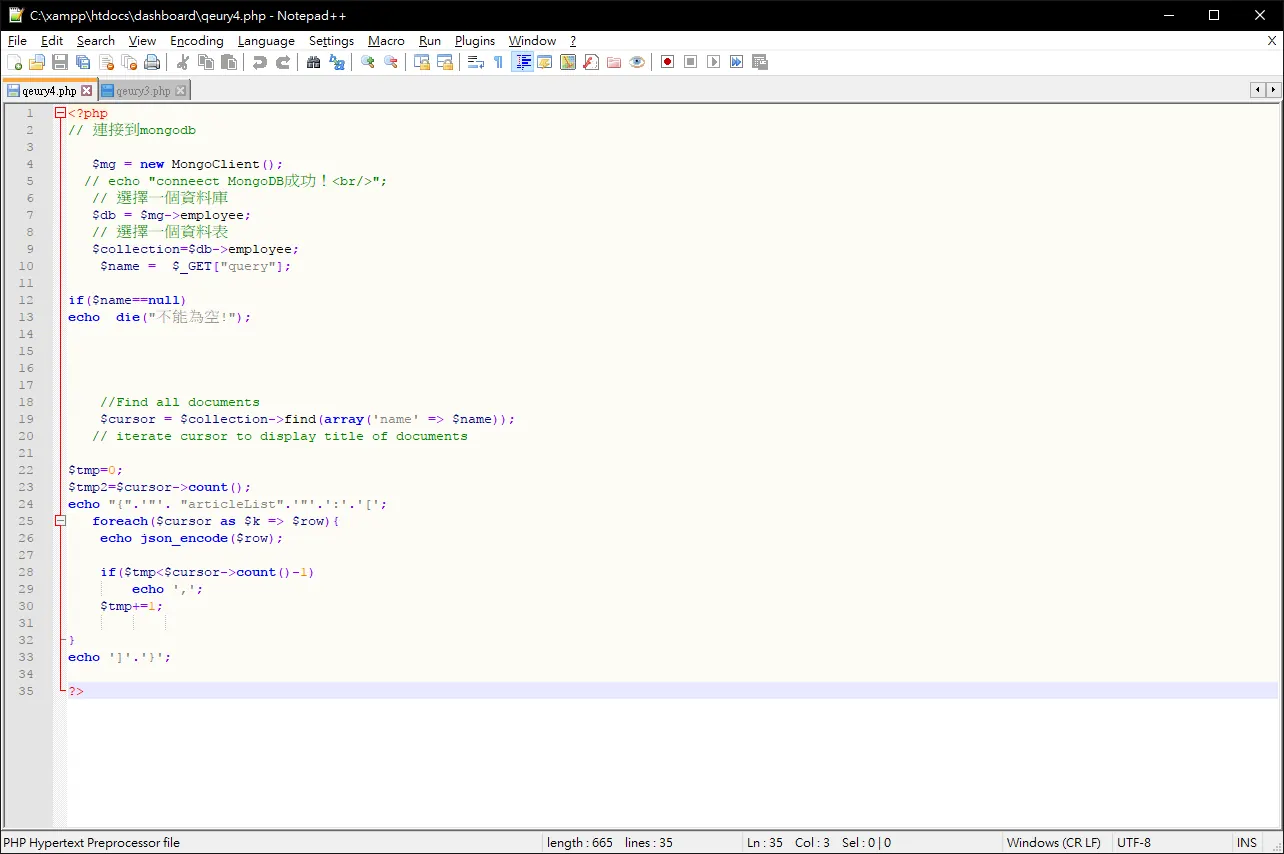
再qeury3.php對mongodb轉為json格式的時候有稍加做修改再次可以方便app做json做讀取動作
Comments