
兩年前的研討會?
---
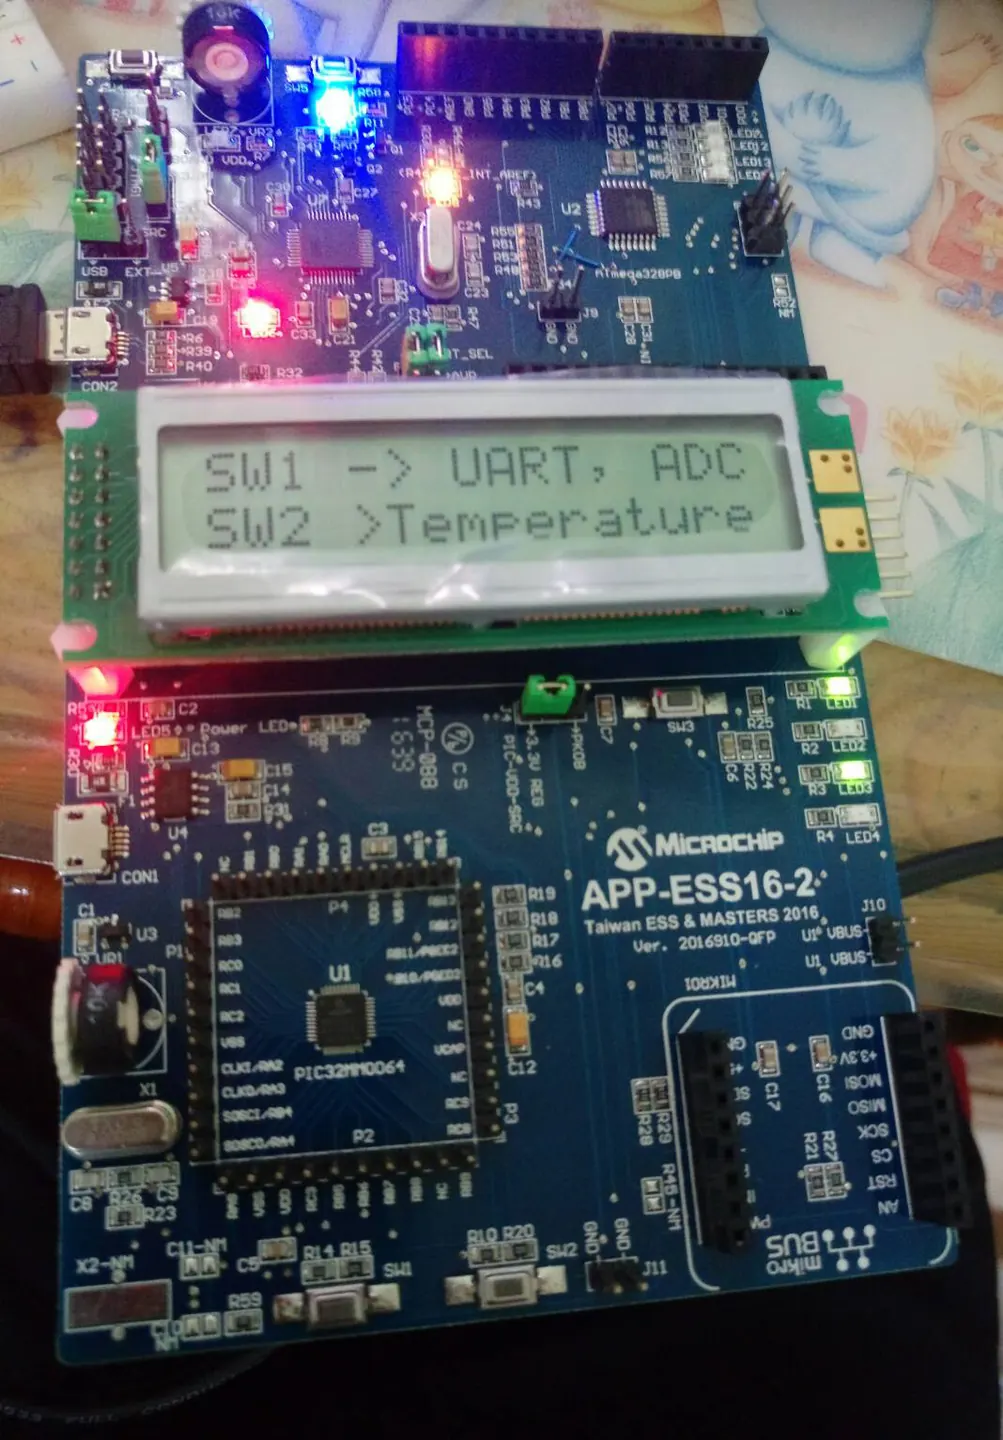 我以為要再買晶片才能燒錄沒看到,偶然發現有附usb線,上面的lcd我們來拔下來做一下小實驗吧
http://www.ltc.com.tw/product_info.php/products_id/55128
首先我們先來查腳位
我以為要再買晶片才能燒錄沒看到,偶然發現有附usb線,上面的lcd我們來拔下來做一下小實驗吧
http://www.ltc.com.tw/product_info.php/products_id/55128
首先我們先來查腳位
再來是 萬用Ardunino
/* Lab9 - 在 2x16 LCD 上顯示 "Hello World" 訊息
  The circuit:
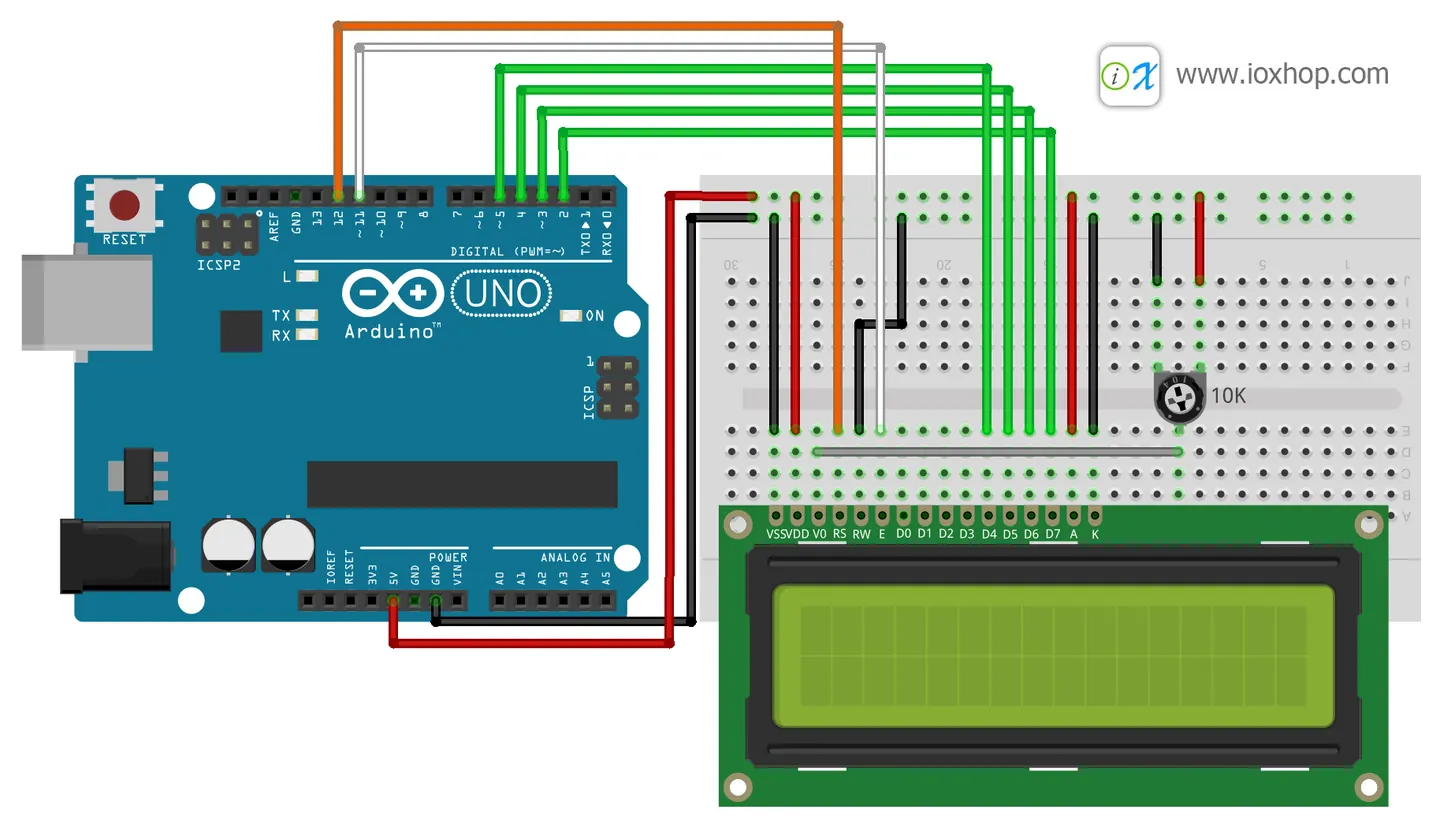
 * LCD RS pin to digital pin 12
 * LCD Enable pin to digital pin 11
 * LCD D4 pin to digital pin 5
 * LCD D5 pin to digital pin 4
 * LCD D6 pin to digital pin 3
 * LCD D7 pin to digital pin 2
 * 10K Potentiometer:
 * ends to +5V and ground
 * wiper to LCD VO pin (pin 3)

 This example code is in the public domain.
 http://www.arduino.cc/en/Tutorial/LiquidCrystal
 */

// 引用 LiquidCrystal Library
#include <LiquidCrystal.h>
#include "SCoop.h" 原文網址:https://itw01.com/FJHCJE3.html
// 建立 LiquidCrystal 的變數 lcd
//                 LCD 接腳:  rs, enable, d4, d5, d6, d7
//      對應到 Arduino 接腳:  12,     11,  5,  4,  3,  2
LiquidCrystal lcd(12, 11, 5, 4, 3, 2);
extern volatile unsigned long timer0_overflow_count;


bool route = false;
bool route2 = false;
byte Chartest[] = {
  B00000,
  B00000,
  B00000,
  B00000,
  B00000,
  B00000,
  B00000,
  B00000
};
byte clearChar[] = {
  B00000,
  B00000,
  B00000,
  B00000,
  B00000,
  B00000,
  B00000,
  B00000
};
byte customChar[] = {
  B00000,
  B00000,
  B00000,
  B01110,
  B10001,
  B11111,
  B11011,
  B00000
};
byte customChar2[] = {
  B00000,
  B00000,
  B00000,
  B00001,
  B00010,
  B00100,
  B01000,
  B10000
};
byte customChar3[] = {
  B00000,
  B00000,
  B00000,
  B10000,
  B01000,
  B00100,
  B00010,
  B00001
};
byte customChar4[] = {
  B00001,
  B00010,
  B00100,
  B01000,
  B10000,
  B00000,
  B00000,
  B00000
};
byte customChar5[] = {
  B10000,
  B01000,
  B00100,
  B00010,
  B00001,
  B00000,
  B00000,
  B00000
};
void setup() {
  mySCoop.start();
  // 設定 LCD 的行列數目 (2 x 16)
  lcd.begin(16, 2);

  // 列印 "Hello World" 訊息到 LCD 上
 // lcd.print("hello, world!");
 lcd.createChar(5,clearChar);
  lcd.createChar(6,Chartest);
  lcd.createChar(0, customChar);
  lcd.createChar(1, customChar2);
   lcd.createChar(2, customChar3);
      lcd.createChar(3, customChar4);
        lcd.createChar(4, customChar5);

     lcd.setCursor(6,0);
  lcd.write(byte(1));
       lcd.setCursor(5,1);
  lcd.write(byte(3));
       lcd.setCursor(10,0);
  lcd.write(byte(2));
         lcd.setCursor(11,1);
  lcd.write(byte(4));

}

//快速定義
defineTaskLoop(Task1) {


    for(int x =0; x < 8;x+=1){
     Chartest[x]={B00100};
      lcd.createChar(6, Chartest);
         lcd.setCursor(8, 0);
               lcd.write(byte(6));
           sleep( 10);
       }

    for(int x =0; x < 8;x+=1){
     Chartest[x]={B00000};
      lcd.createChar(6, Chartest);
         lcd.setCursor(8, 0);
               lcd.write(byte(6));
       Chartest[x]={B00100};
      lcd.createChar(6, Chartest);
         lcd.setCursor(8,1);
               lcd.write(byte(6));
           sleep( 10);
       }

  for(int x =0; x < 8;x+=1){
     Chartest[x]={B00000};
      lcd.createChar(6, Chartest);
         lcd.setCursor(8,1);
               lcd.write(byte(6));
           Chartest[x]={B00000};
      lcd.createChar(6, Chartest);
         lcd.setCursor(8,0);
               lcd.write(byte(6));
           sleep( 20);
       }


        sleep( 100);
}

//    sleep( 1000);
// lcd.setCursor(0, 0);
//     lcd.print("50/km");


//      for(int x =0; x < 50;x+=1){
//           sleep( 50);
//          lcd.setCursor(0, 1);
//
//   char myStg[10];
//sprintf(myStg, "%d", x);
//
//   lcd.print(myStg);
//      }


void loop() {
  yield();

  // 將游標設到 column 0, line 1
  // (注意: line 1 是第二行(row),因為是從 0 開始數起):
//      sleep(100);
//  lcd.setCursor(8, 1);
//
//   lcd.write(byte(5));

//
//     lcd.setCursor(8, 1);
//   lcd.write(byte(0));


}
字元產生器
https://maxpromer.github.io/LCD-Character-Creator/
腳位圖
不能操控喔喔喔
那能不能顯示畫圖或曲線呢
---
初步構想是這樣的
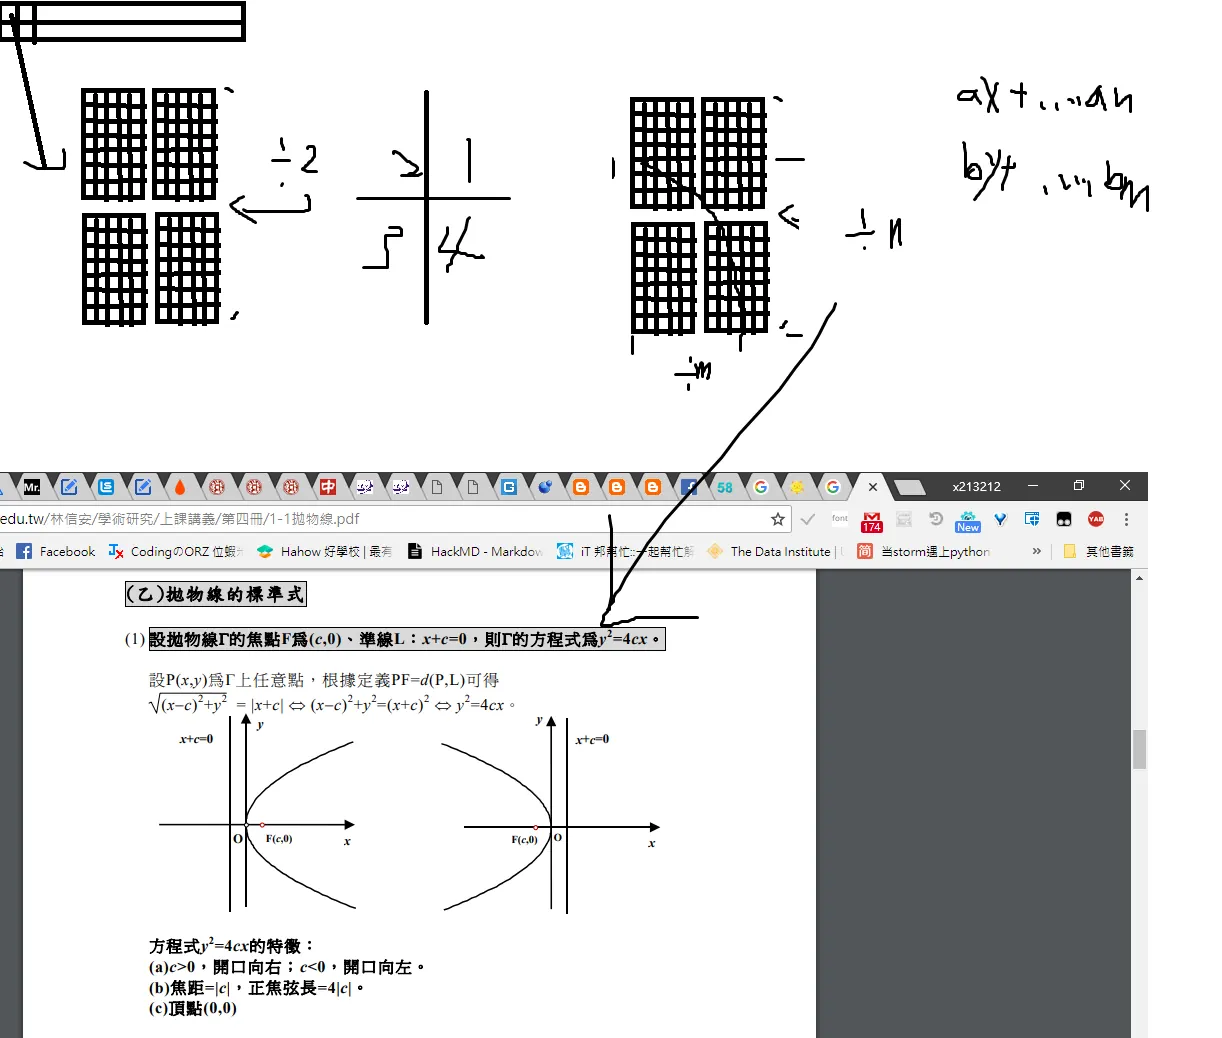 在畫軌道的時候想到的則
我們只要除於預設大小的Mxn 共有幾個點
再帶入函數即可劃出稍微大一點的圖
在畫軌道的時候想到的則
我們只要除於預設大小的Mxn 共有幾個點
再帶入函數即可劃出稍微大一點的圖
顯示大圖篇
---
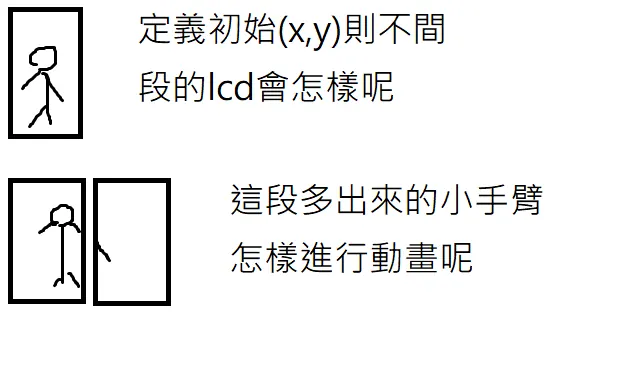 這時候我們可以看到
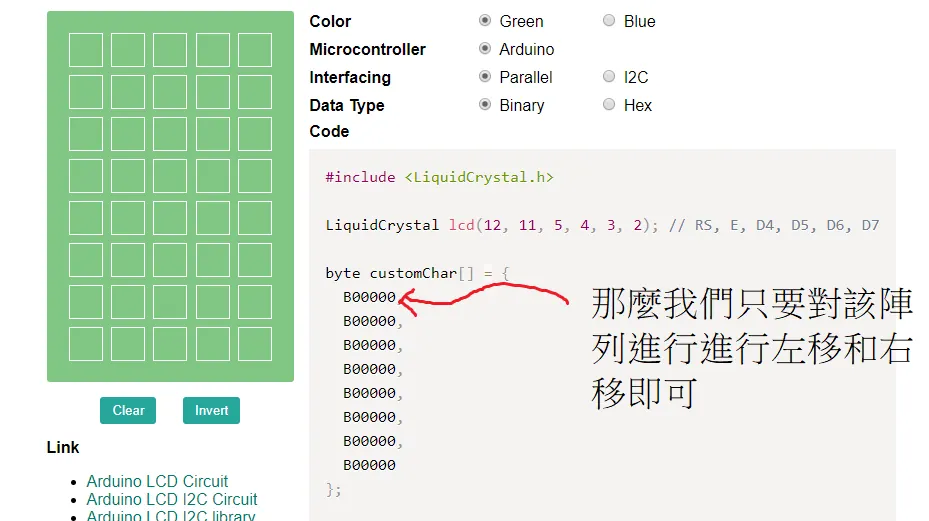 那麼呢
那麼呢
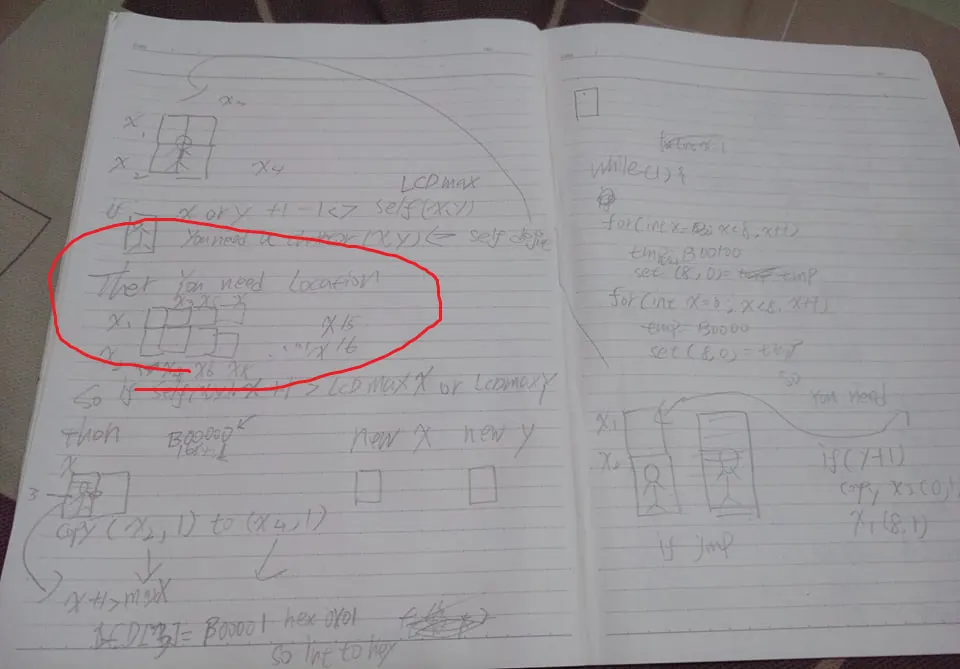
這些我們都要自行定義隔壁是誰,如果我預設角色座標是(0,0),那麼我x+1則,
我的虛擬座標要x+1
然後超出陣列的話,也就是 虛擬座標x+1自定義的字元超出lcd 小方塊預設的陣列大小某行(多行)
則x+1 話 那麼 x4 的某行 則會顯示x2超出陣列的某行的點,
則x+1的話 那麼我自定義字元的超出陣列的那行得值將會進行左移4個
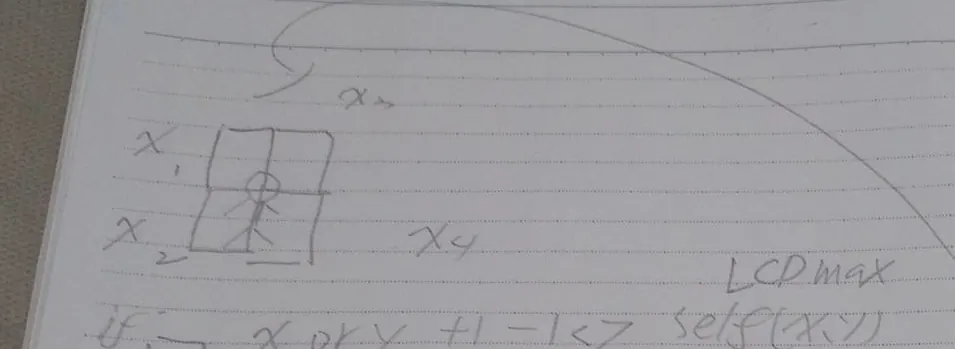 這樣的話當遇到這種狀況我們可以定義一下
自定義字元預設的高度和大小,整體來說就可以顯示稍微大一點的動畫
ㄎㄎ不實做了
這樣的話當遇到這種狀況我們可以定義一下
自定義字元預設的高度和大小,整體來說就可以顯示稍微大一點的動畫
ㄎㄎ不實做了
Comments